LTI 1.3 Canvas Setup (Recommended)
Last updated September 30, 2026
This guide provides Canvas administrators with the steps to set up the Flat for Education LTI 1.3 integration using dynamic registration. LTI 1.3 is the modern standard that offers enhanced security, improved stability, and a streamlined setup process compared to LTI 1.1.
Prerequisites
Before starting, ensure you have:
- Canvas administrator access
- A Flat for Education account with Admin or Support admin role
Step 1: Generate Dynamic Registration Link
To begin the integration, you'll need to generate a unique registration URL from your Flat for Education account.
- From your Integrations page within Flat for Education, click on Canvas. This will open a new configuration window.
- From this window, copy the generated registration URL.
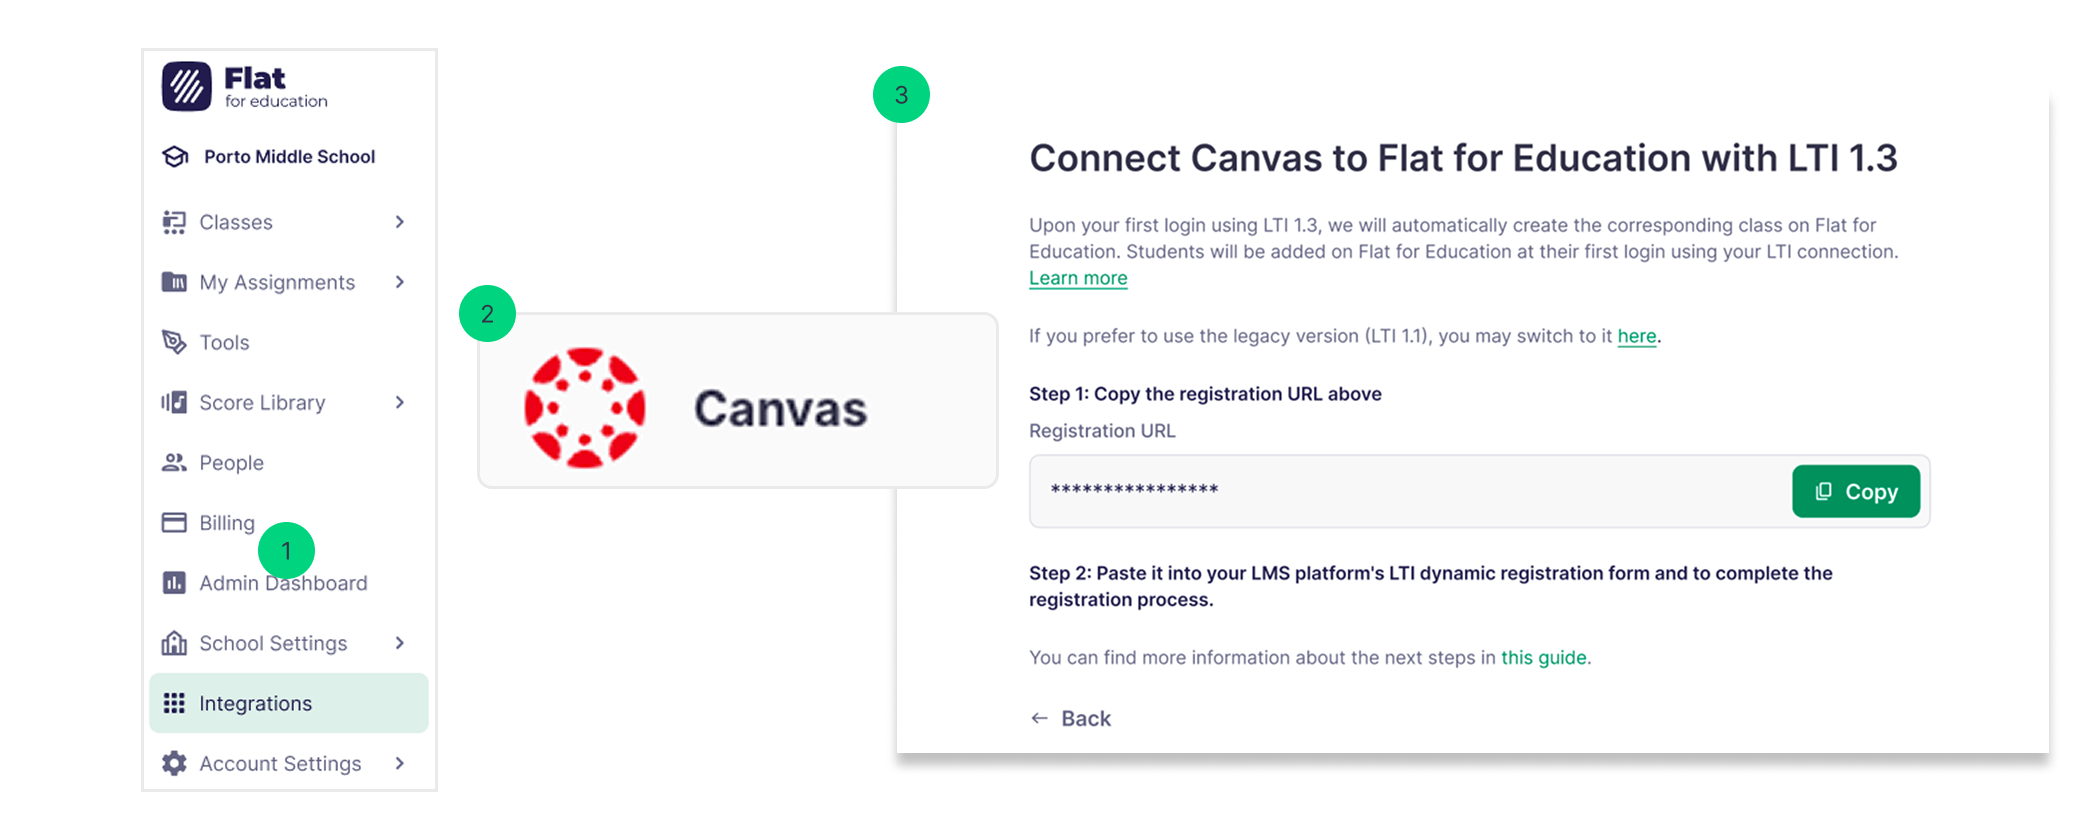
Next, paste this URL into Canvas’ dynamic registration form to initiate and complete the registration process.
Step 2: Canvas Administrator Setup
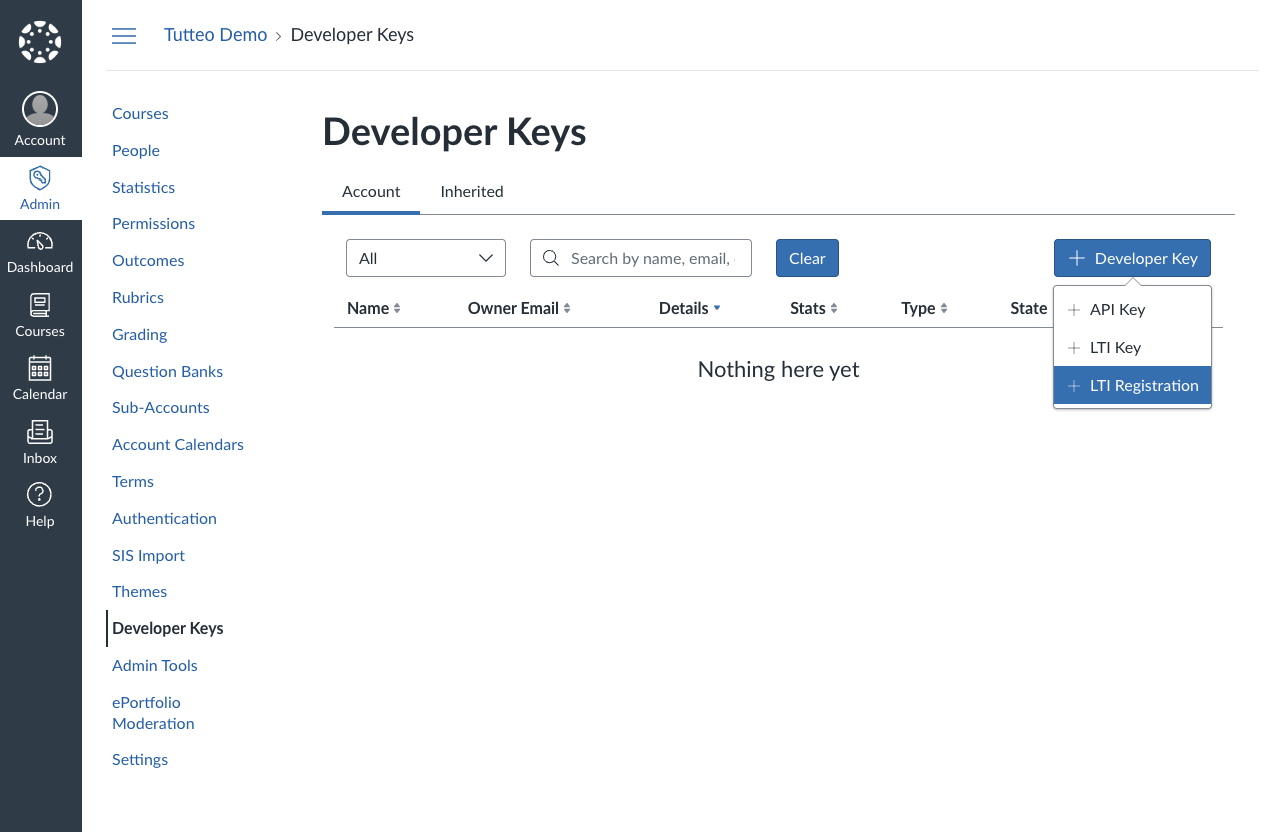
Access Developer Keys
- Open Canvas Admin panel
- Navigate to Developer Keys in the left sidebar
- Click the + Developer Key button
- Select LTI Registration from the dropdown menu
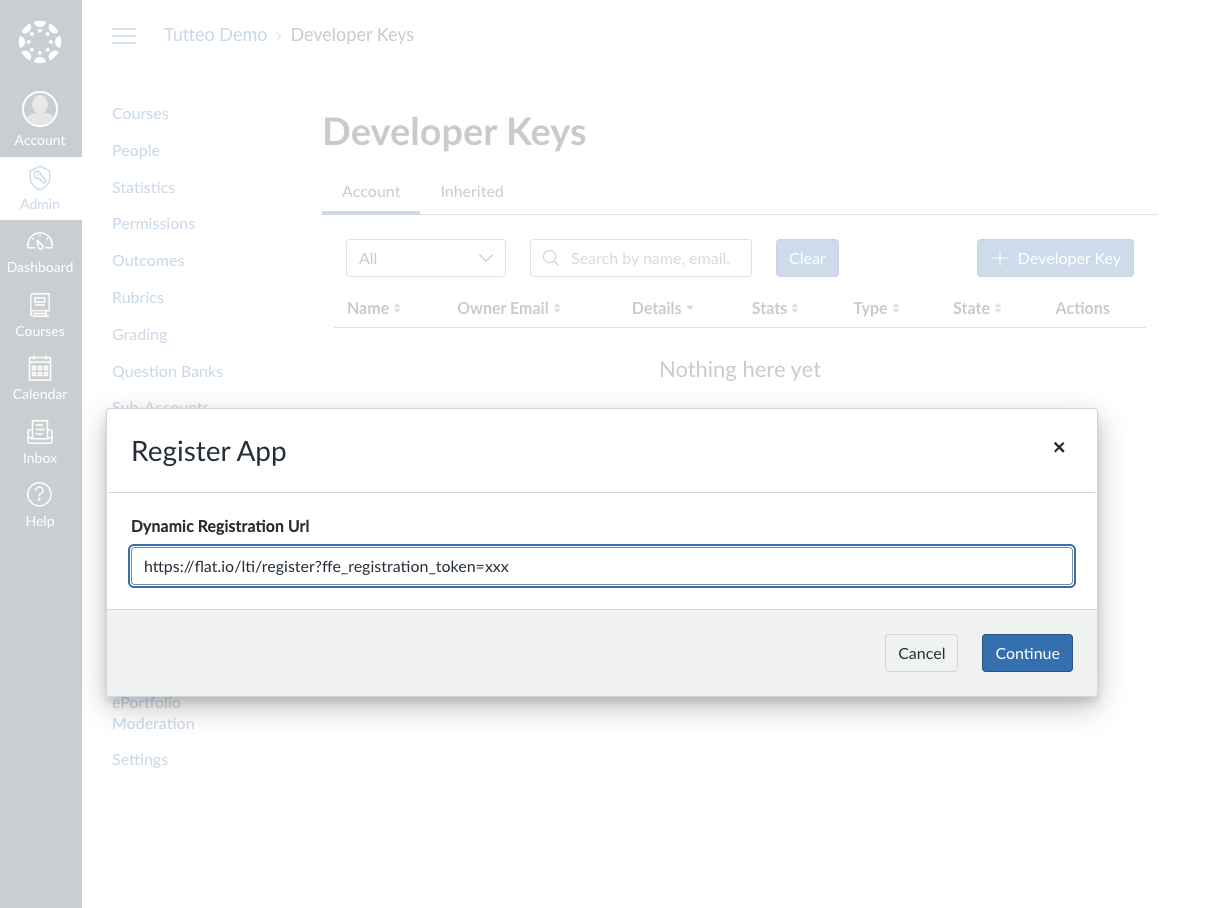
Register the LTI Tool
- Paste the registration link provided by Flat for Education into the registration URL field
- Click Continue to proceed with the registration
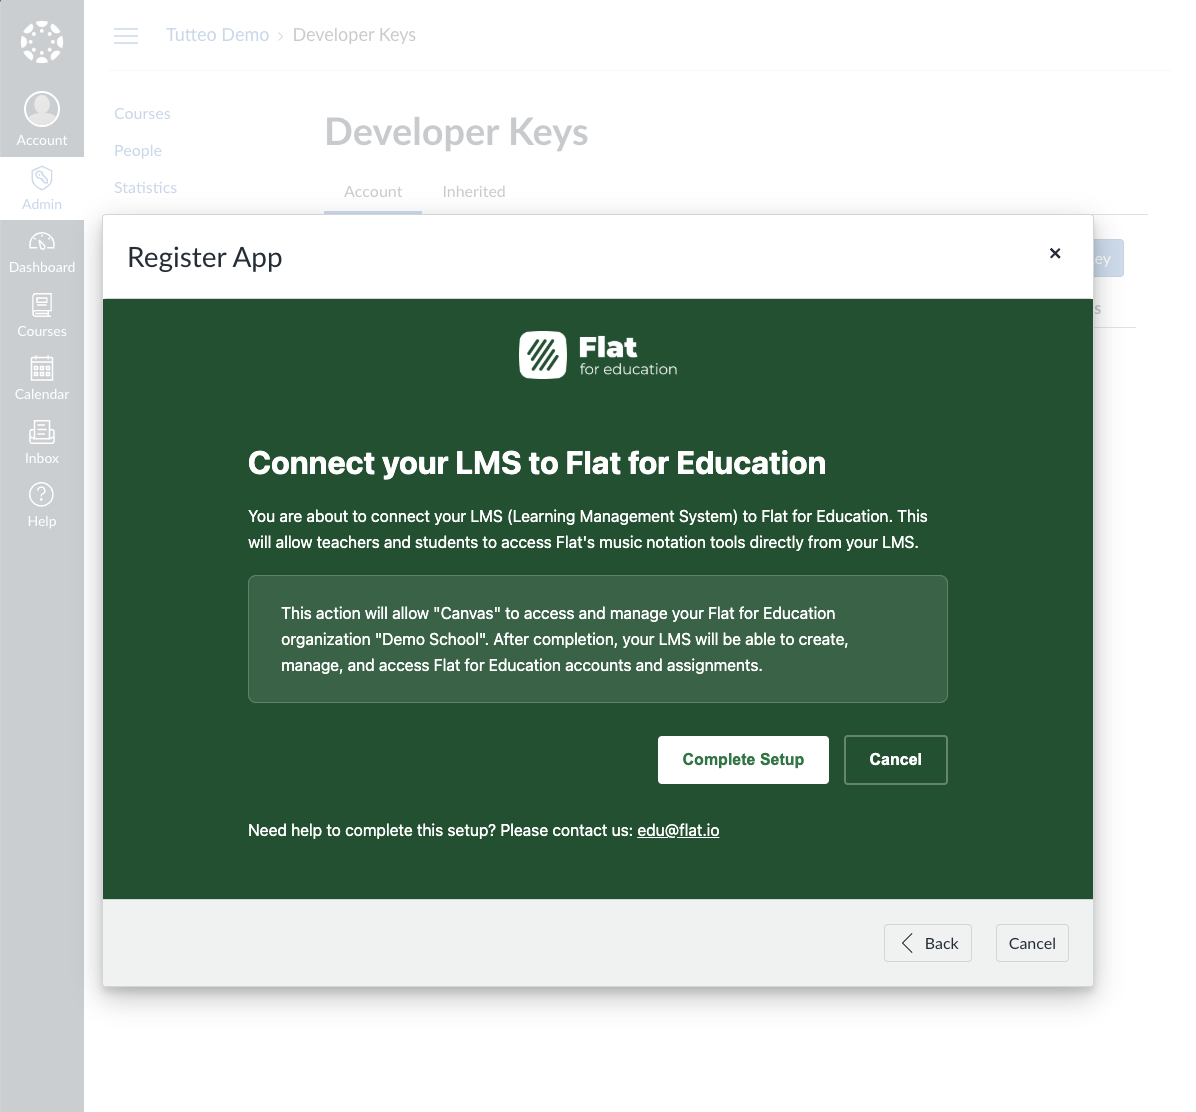
Complete Setup
- Review the integration details presented by Flat for Education
- Read the privacy notice and terms of service
- Click Complete Setup to finalize the registration
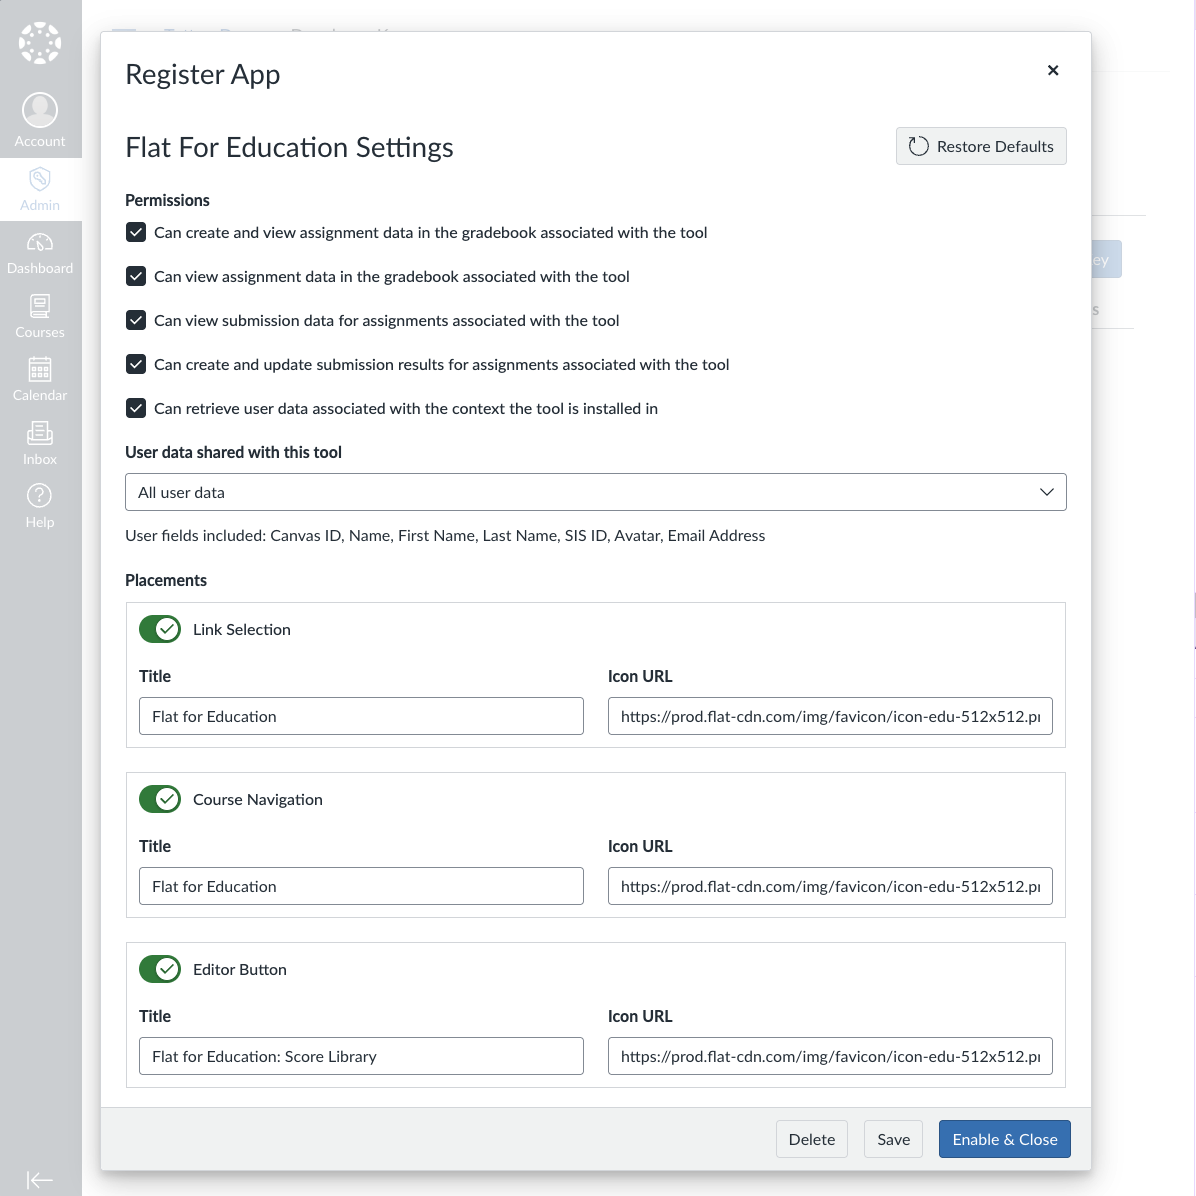
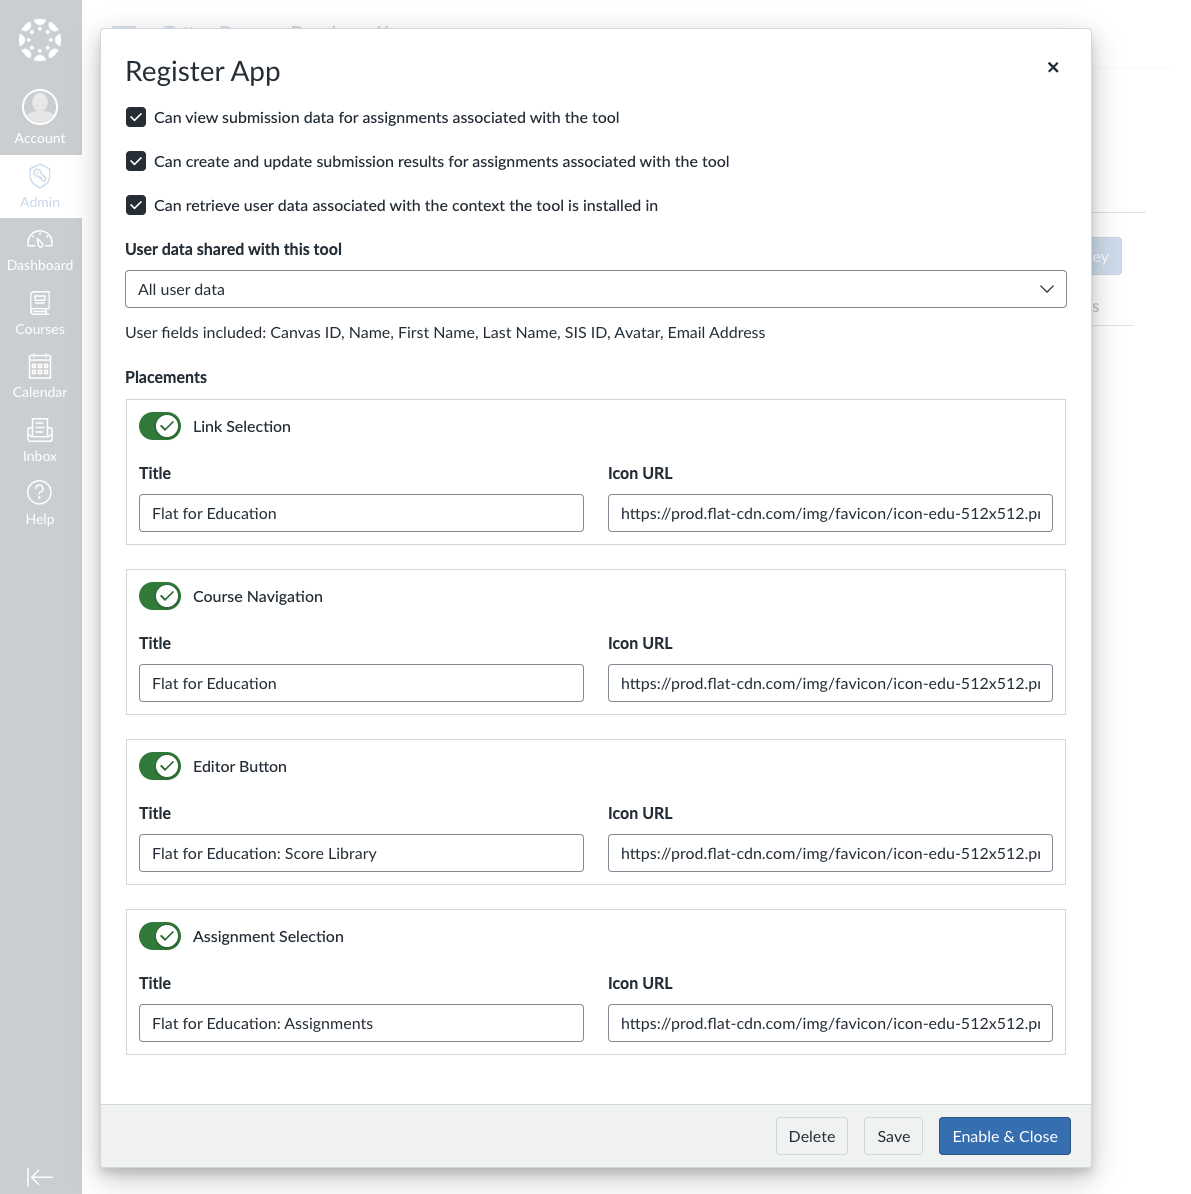
Configure Data Sharing and Placements
- Configure data sharing preferences according to your institution's privacy requirements
- Review and disable placements if you want to limit where the tool appears in Canvas
- Adjust any other settings as needed for your institution
Enable the Integration
- Review all settings to ensure they match your requirements
- Click Enable & Close to activate the integration
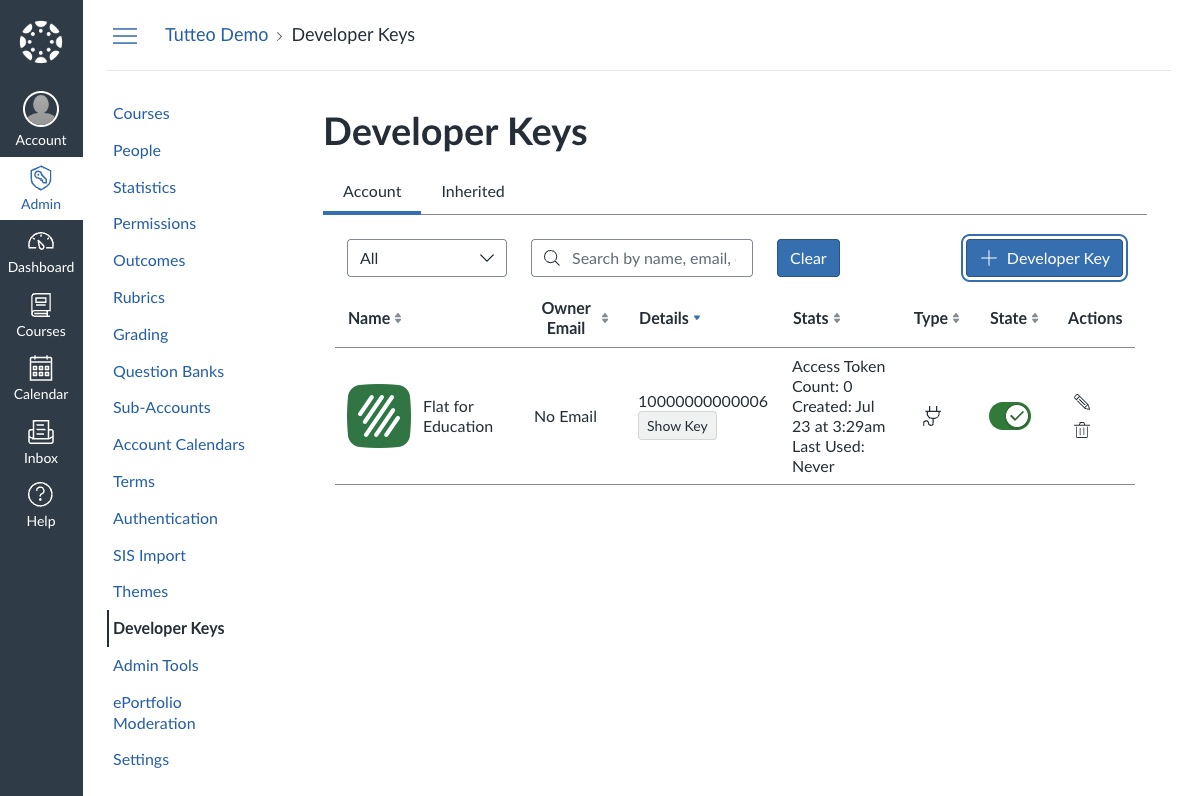
Once the LTI 1.3 integration is configured at the admin level, instructors can add it to their courses.
Get the Client ID
After completing the admin setup, Canvas will generate a Client ID (e.g., 10000000000006). This ID will be visible in your Developer Keys section and is needed for course-level installation.
Course-Level Installation
Instructors should follow these steps to add Flat for Education to their courses:
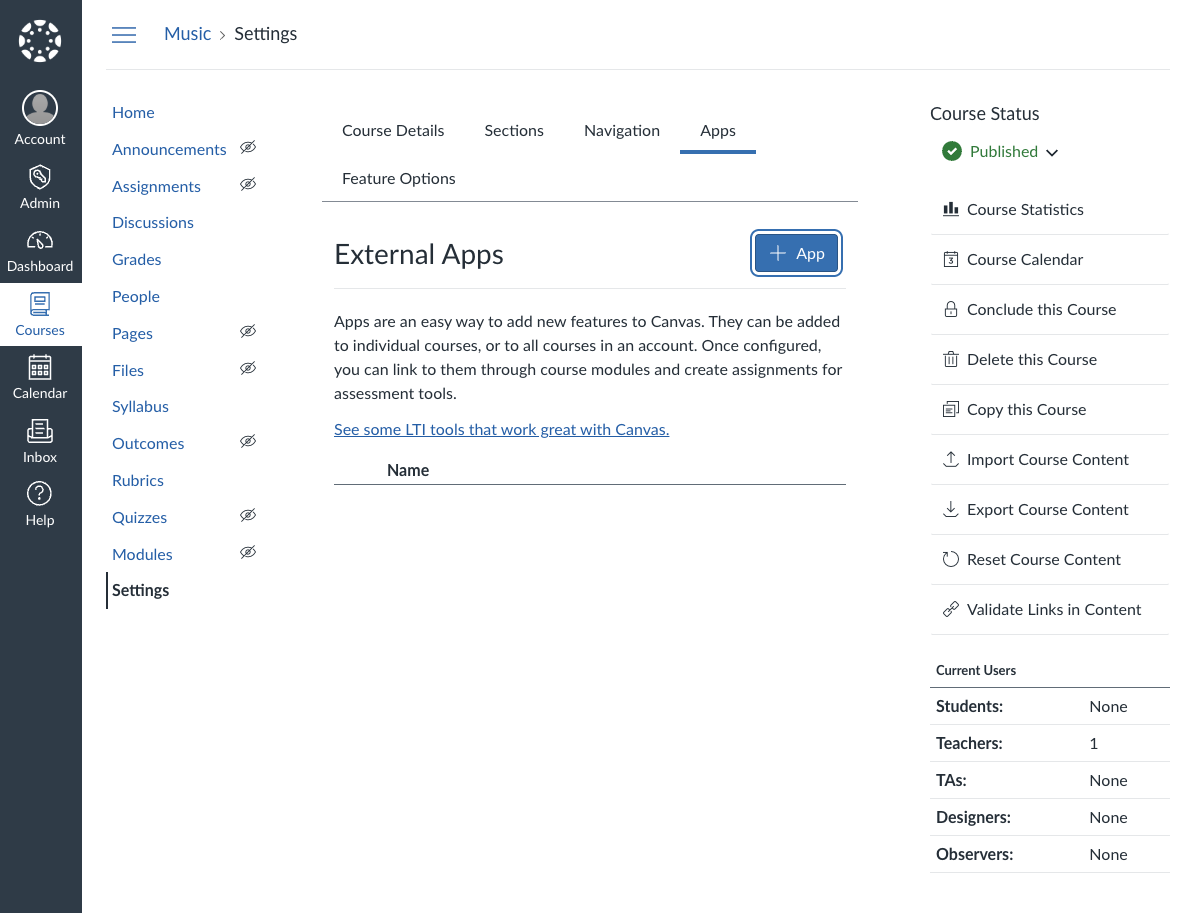
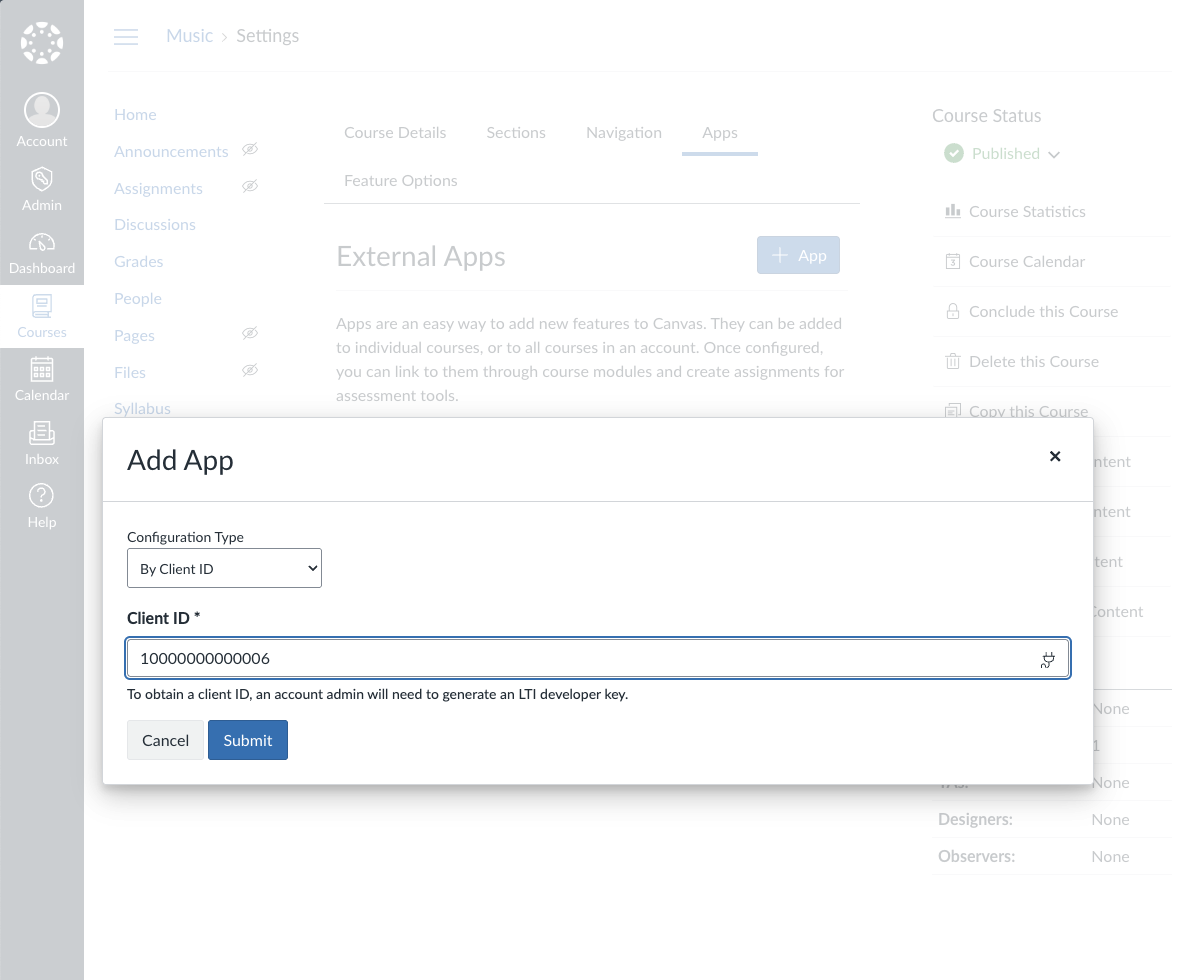
- Open the course where you want to add Flat for Education
- Go to Settings > Apps tab
- Click + App to add a new external tool
- Choose "By Client ID" as the configuration method
- Enter the Client ID generated during admin setup
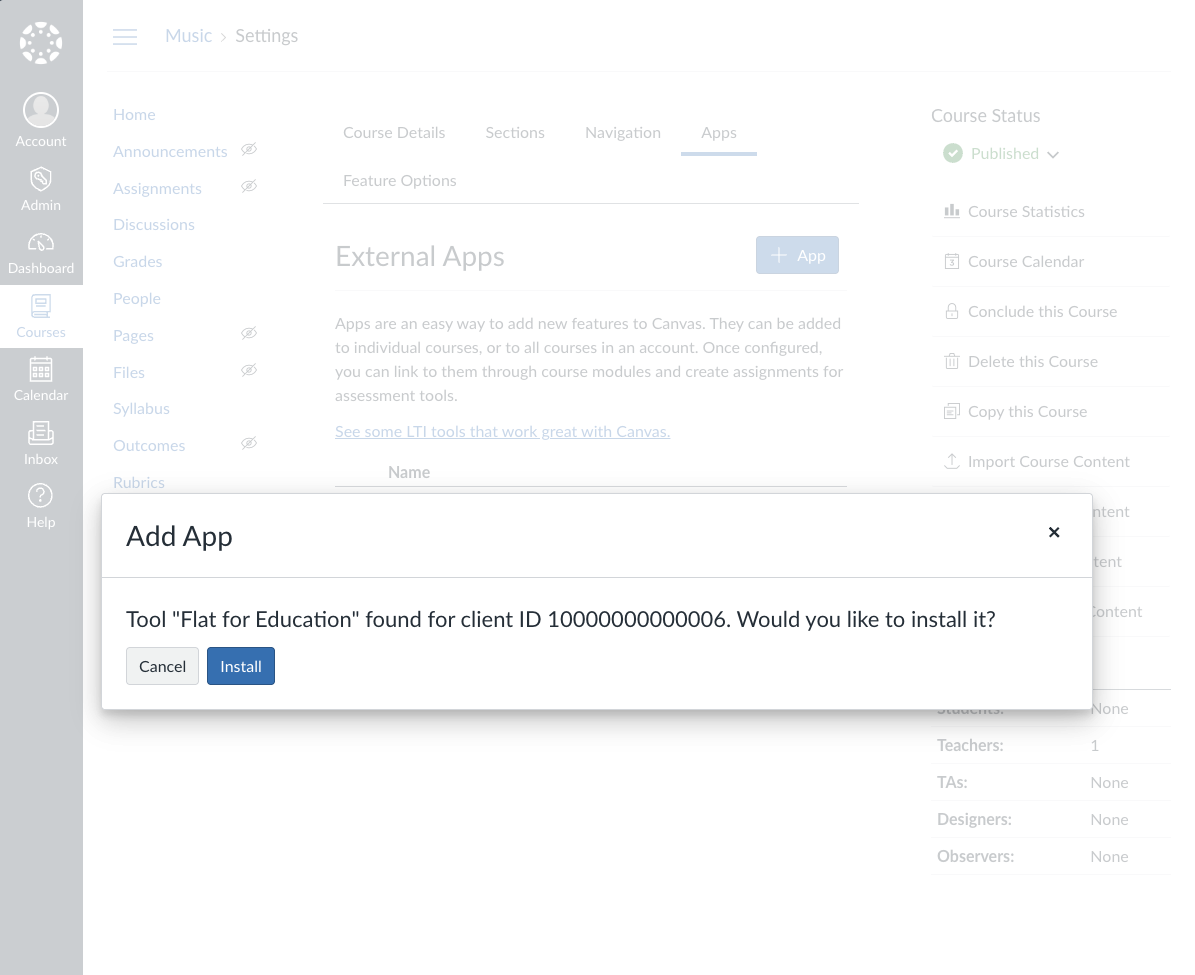
- Click Submit to add the tool
Verify Installation
After installation, verify that Flat for Education appears correctly in your course:
Optional: Test LTI 1.3 before switching from LTI 1.1
If you'd like to try LTI 1.3 before making the full switch, you can. Your LTI 1.1 integration can stay in place while you test, because both can run in your Canvas instance at the same time.
- Complete Step 1 and Step 2 above to create and enable the LTI 1.3 Developer Key.
- In Step 3, install the app by Client ID in a single test course rather than at the account level.
- Test with a teacher account and a student account.
- When everything works as expected, install the LTI 1.3 app at the account level.
Troubleshooting
Common Issues
- Registration Link Expired: Contact Flat for Education support to generate a new registration link
- Insufficient Permissions: Ensure you have Canvas administrator privileges
- Client ID Not Found: Verify the LTI 1.3 tool was successfully registered in Developer Keys
- Privacy Settings: Adjust data sharing settings if students can't access their accounts
Getting Help
If you encounter issues during setup:
- Check that your Canvas instance supports LTI 1.3
- Contact Flat for Education support with:
- Your Canvas domain
- The Client ID generated
- Screenshots of any error messages
Next Steps
Once LTI 1.3 is configured: